|
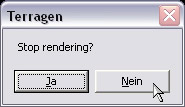
How to Pause a Render - Terragen TutorialOr; Multiple Session Rendering[für die deutsche Vesion - hier klicken] |
 |
 |
 |
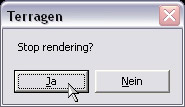
| Cheer up! | Don't panic! ;-) |
The lower part of the unfinished render appears black. The image will look exactly the same in your graphics application.
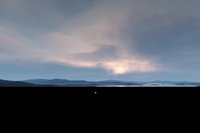 |
| Example: 3000x2000 with "ultra", aborted after 6 hours. |
Before you quit everything you should save all your settings. Write down all the settings that are not saved with your worldfile! As far as I know, the values for the plugins "SortaSurf"; "SortaSurf Multi"; "HeightRipples"; and, maybe more, will not be saved. I also recognized that the watersettings "Patch Sharpness" and "Distort by Terrain" can be reset to 20 when opened again; though you had other values before.
The settings for the "Raindrops" plugin can never be reproduced again!
Well, shut down your machine and go to sleep, go for a six week holiday to California or whatever you like!
...
When you want to go on with your render, you open your files again in Terragen and make sure you have exactly the same settings as before. Before you hit the "Render" button you'll have to make a little change: Under "Camera Orientation / bank“ you fill in a value that is rotated by 180°. So instead of 0° you fill in 180°, instead of 12° you fill in 192° etc..
Now the rendering goes on - from the top! So the missing lower part of your previous render will be finished upside down.
Render as long as it seems necessary by visual judgement. It is certainly better to have an overlapping area. You might orientate yourself at a prominent terrain shape e.g..
If you like it more exactly, you might measure off the missing part of your first render with a ruler on your screen. Normally the rendering window will be of the same size again, so you can easily measure off - how much has to be rendered.
Then you abort with the "Escape“ key and save the second render to disk.
 |
||
| Example: 2nd part after 8 hours |
Now you open Photoshop or another graphics program that is capable of using layers. You open both renders. Rotate the second render by 180°. Copy and paste this render (as a layer) to the first one. Select the black area and expand the selection by 1 or 2 pixels (just to be on the safe side). Now press "delete" and flatten the image - ready! :-)
There should be absolutely no loss of quality with this method, no visible seam or anything. Don't forget to save your work (maybe under a new name if you want to keep your original renders)!
 |
+ |  |
= |  |
| 2nd part, rotate by 180°, add to | part 1, delete the black area - | ready! |
3. Pause Your Render Arbitrarily Often
When I once had an image that did not finish even after the second render, I got the idea of making a third render to finish the missing central part.
For doing this, you load your files as described in step 2. You leave your camera settings untouched now! You only alter the image height (the width must stay the same!). Then Teragen renders the central part of the image.
You decrease the image height by the amount of pixels that is definitely finished by your first two renders. To find out the right amount, you put together your first two renders after the method I described before. Then you measure off the height of the smallest finished part (e.g. with the rectangular marquee tool). Multiply this value by 2 and subtract it from the total image height. The result is the value for the image height that you enter in Terragen. Again: The image width must stay unchanged! Then render!
I will give an example:
An image of the size 3200x2400 pixels was aborted after the first part was finished with 600 pixels. Then the second (rotated) render was aborted after finished 800 pixels. After the calculation (mentioned above) there is missing a central part of 1200 pixels (2400 - 2 x 600). For safety (seamless pw) I add 2 Pixels on both sides. So I enter the value 1204 for the image height in Terragen. (Image width stays 3200). When the third part is ready, you can add it to the first two in your graphics application. Voilà!
(In this example you theoretically could abort this third render after having finished at least 602 or 604 pixels, because the lower part is higher than the upper part)
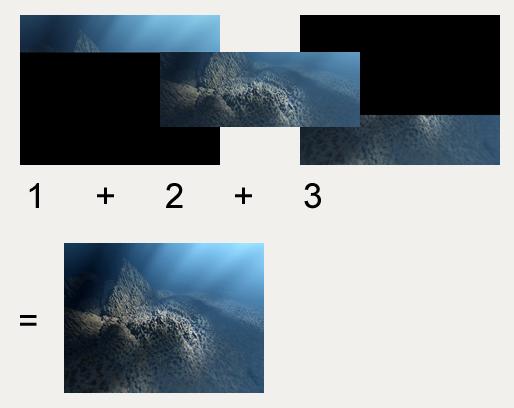
One Tip for the work with Photoshop: I recommend to have the background image fully visible (scroll bars inactive). When you paste in the third render, it automatically will be placed perfectly and centrically.
If tven this third render is not completely finished, and you have to quit Terragen - don't worry: You can make a fourth render - rotated by 180°!
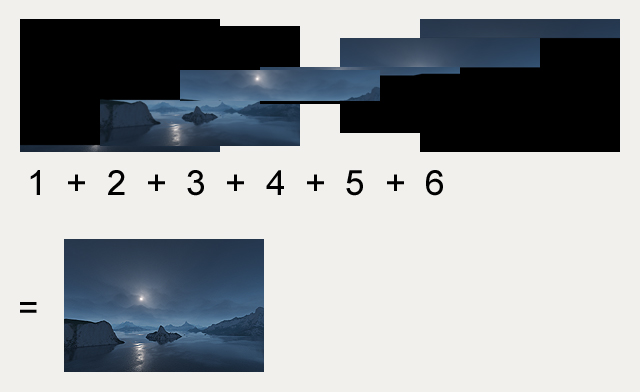
After this principle you can render an image in many sessions. E.g. the image below was rendered in 6 parts (all together more than 24 hours)
THANK YOU: To Bob Choronzuk (aka choronr) for reviewing and correcting the text!
To the users of TerraDreams who have proved the german version of this tutoial and for the suggestions they made.
Happy rendering! I am always thankful for feedback of any kind, yours,
Jens (joshus_hund)
last version: 05-07-14


 !
!